Setup guide · about 15 minutes
Use your own relay
When your two computers can't reach each other directly, traffic goes through a relay. RelayKey gives you a shared one. Use your own instead and you get 50% off — and nobody else's traffic on it.
Your relay cannot read anything it carries: it only forwards already-encrypted data. It does see the size and timing, and the IP addresses of both ends.
Recommended
Set it up with Cloudflare
Free allowance covers normal use. You need a Cloudflare account — not a domain.
- Sign in at dash.cloudflare.com.
-
Type TURN Server into Cloudflare's search bar and pick the result.
Faster than hunting through the sidebar.
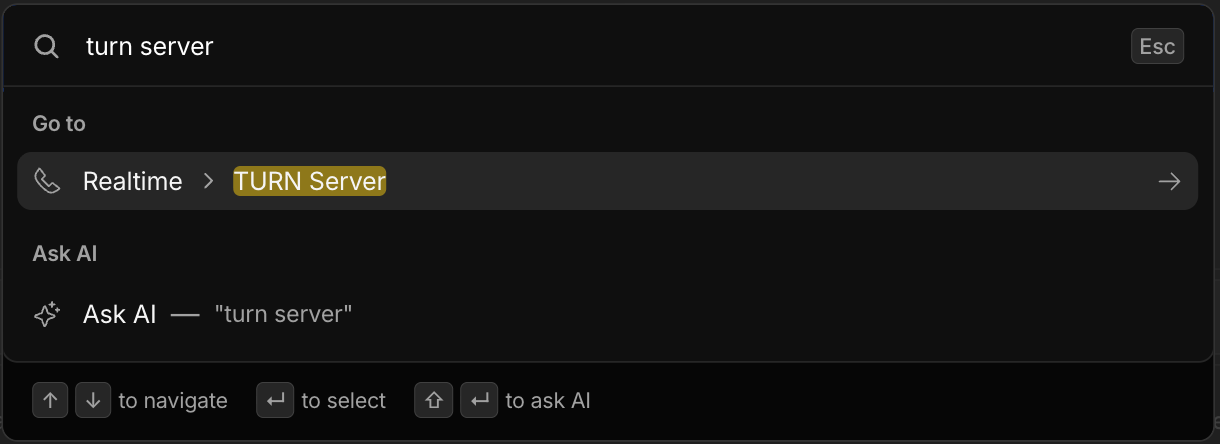
Type TURN Server into Cloudflare's search bar. - Click Create to make a TURN key. Give it any name, for example
relaykey. - Cloudflare shows you a Key ID and an API Token. The token is displayed once — copy it now.
- In RelayKey: Settings → Relay → Cloudflare, paste both values, and press Test.
- Key ID
- A short hex string. Not secret.
- API Token
- The secret that goes with that key. Store it in RelayKey and nowhere else you do not need it.
That is all it needs — not your Cloudflare email, password or account ID. If the token leaks, delete the key in the dashboard and make another. Nothing else in your account is exposed.
Other options
Cloudflare is the quick path. These two need more work.
Run your own relay with Docker
Run your own with Docker
coturn is the standard open-source relay server, and it publishes an official Docker image — so this is one config file and one command, with nothing installed on the host.
You need a small VPS with a public IP. The cheapest tier is plenty for a few people.
First, a secret. Generate it and keep the output:
openssl rand -hex 32Save this as turnserver.conf, with your own IP and secret:
listening-port=3478
tls-listening-port=5349

# Your server's PUBLIC IP. On a cloud VM whose network card holds a
# private address, set both: external-ip=PUBLIC/PRIVATE
external-ip=203.0.113.10

realm=turn.example.com

# Time-limited credentials from one shared secret. No user accounts
# and no password database to look after.
use-auth-secret
static-auth-secret=PASTE_THE_SECRET_HERE

# Relay only. Without these, anyone who finds your server can use it
# to reach private networks behind it.
no-multicast-peers
denied-peer-ip=10.0.0.0-10.255.255.255
denied-peer-ip=172.16.0.0-172.31.255.255
denied-peer-ip=192.168.0.0-192.168.255.255
denied-peer-ip=169.254.0.0-169.254.255.255
denied-peer-ip=127.0.0.0-127.255.255.255

# Keep the logs boring.
no-cli
simple-log
Then start it:
docker run -d --name coturn --restart unless-stopped \
  --network host \
  -v ./turnserver.conf:/etc/coturn/turnserver.conf:ro \
  coturn/coturn
Why --network host
A relay hands out a different UDP port for every connection, across a range of
thousands. Publishing that range with -p makes Docker start one forwarding
process per port and the container will not come up. --network host is the
supported way to run this image, and it is why the ports below are opened in your
firewall rather than mapped.
Check it started: docker logs coturn. Upgrading later is
docker pull coturn/coturn then removing and re-running the container — your
config file is untouched.
Ports to open
- 3478/udp and 3478/tcp — UDP is what gets used; TCP is the fallback on networks that block UDP.
- 5349/tcp — only if you set up TLS certificates.
- 49152–65535/udp — the relay port range. This one is easy to forget and nothing works without it.
Open them in your cloud provider's firewall and in the host firewall if it has one.
What to put in the app
- TURN URL
turn:turn.example.com:3478— your host name or IP. Useturns:turn.example.com:5349if you set up TLS.- Shared secret
- Exactly the
static-auth-secretvalue from the config.
There is no username or password to enter, and this is the interesting part: coturn needs no API call whatsoever. The app takes your shared secret and computes a time-limited username and password locally, on your device, using the same HMAC that coturn will use to check them. Nothing is transmitted to obtain a credential — not to us, not to anyone. The first packet that leaves your machine on account of the relay is the connection to your own server.
That, plus the fact that a coturn shared secret grants relay access and nothing more, is why coturn is the strongest choice if confidentiality is what brought you to this page.
Caveat — keep the secret secret
Anyone who has it can use your server as a relay, on your bandwidth bill. Rotate it by
changing static-auth-secret, restarting coturn, and pasting the new value
into the app.
Use Twilio
Provider · pay per gigabyte
Twilio
Twilio's Network Traversal Service works well and is billed per gigabyte, with no free tier worth planning around. Use it if you already have a Twilio account.
- Sign in at console.twilio.com.
- Copy your Account SID from the account dashboard. It begins with
AC. - Go to Account → API keys & tokens and click
Create API key. Name it
relaykeyand choose the Standard key type. - Twilio shows an SID beginning with
SKand a Secret, once. Copy both before leaving the page. - In RelayKey: Settings → Relay → Twilio, paste the Account SID in the first field and the credential in the second.
Exactly what to paste in the credential box
The credential field takes one string, and the app decides what it is by looking for a colon.
Recommended — API Key SID and Secret, joined by a colon:
SK0123456789abcdef0123456789abcdef:your_api_key_secret_here
That is the SK… value, then :, then the secret, with no spaces
and no quotes. Because the string contains a colon, the app uses it as the API key pair.
Also accepted, but not recommended — your Account Auth Token on its own:
your_account_auth_tokenWith no colon present, the app pairs the value with your Account SID and treats it as the Auth Token.
Caveat — prefer the API key, and here is why it is not a formality
Your Account Auth Token is the master credential for your entire Twilio account: it can send SMS and place calls at your expense, read your message history, and change billing. An API key can only be used for API calls, you can create one per application, and you can delete it in the console without touching anything else — so if it ever leaks, revoking it costs you nothing but a re-paste.
This matters most in the browser client, where the value is kept in browser storage. The macOS app stores it in the system Keychain, which is meaningfully better protected. In a browser, assume the credential is only as safe as the device and the browser profile it sits in — and put something revocable there.
- Account SID
- Begins with
AC. Identifies the account; not a secret by itself. - Credential
- Either
SK…:secret(recommended) or a bare Auth Token.
Quick answers
- Does my provider secret reach RelayKey?
- No. It stays on your computer and talks only to your provider.
- Do both computers need this?
- No — only the one you sit at.
- Will it be slower?
- Usually faster, since you pick the region. Most sessions never use a relay at all.
- How do I know it worked?
- Press Test. In a session, the badge shows which path is in use.
- Can I go back?
- Yes. Clear the fields in Settings → Relay.